FINISHING TouchesThis week I have completely finished the entire wooden deer blind. All I did this week was attach a camo netting that I ordered last week to the outside walls of the deer blind. To do this I used a staple gun to attach the netting. This was a very easy process to do. I did have some problems with the cord of the staple gun, but eventually I got it to work properly. I also made sure that the blind appeared to be safe to be in for long periods of time. This is important because I really do not want to be sitting in a blind when it collapses. The blind appeared to be very sturdy, so I think that I will be ok. Throughout the entire project I had safety in mind, so many aspects of the blind are overbuilt, which I think is definitely a good thing. Some of the overbuilt aspects are using 3 quarter of an inch thick plywood and putting extra 2 by 4’s for support on the frame of the deer blind. 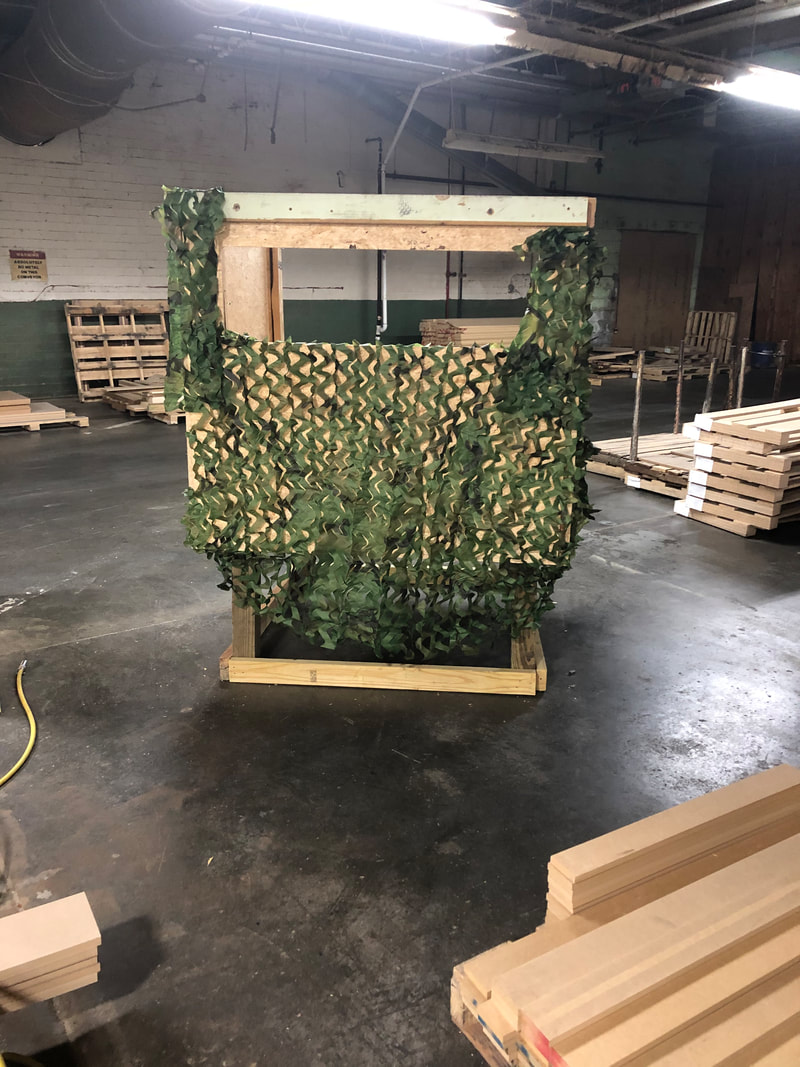 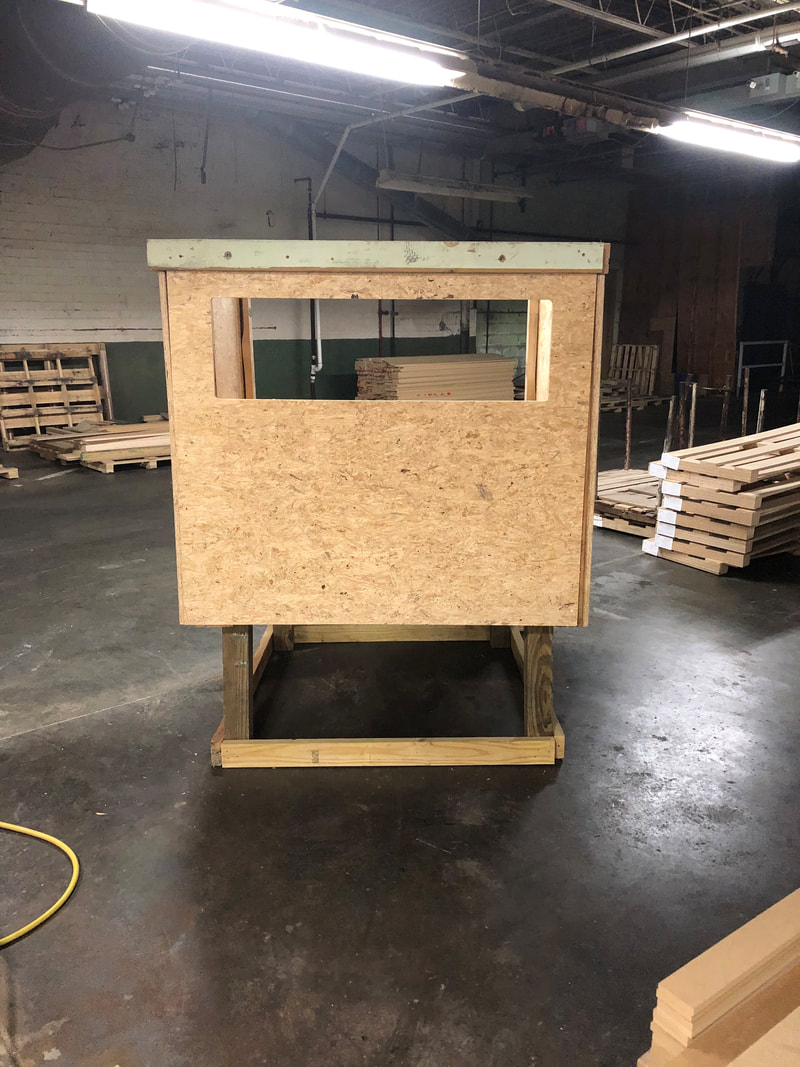 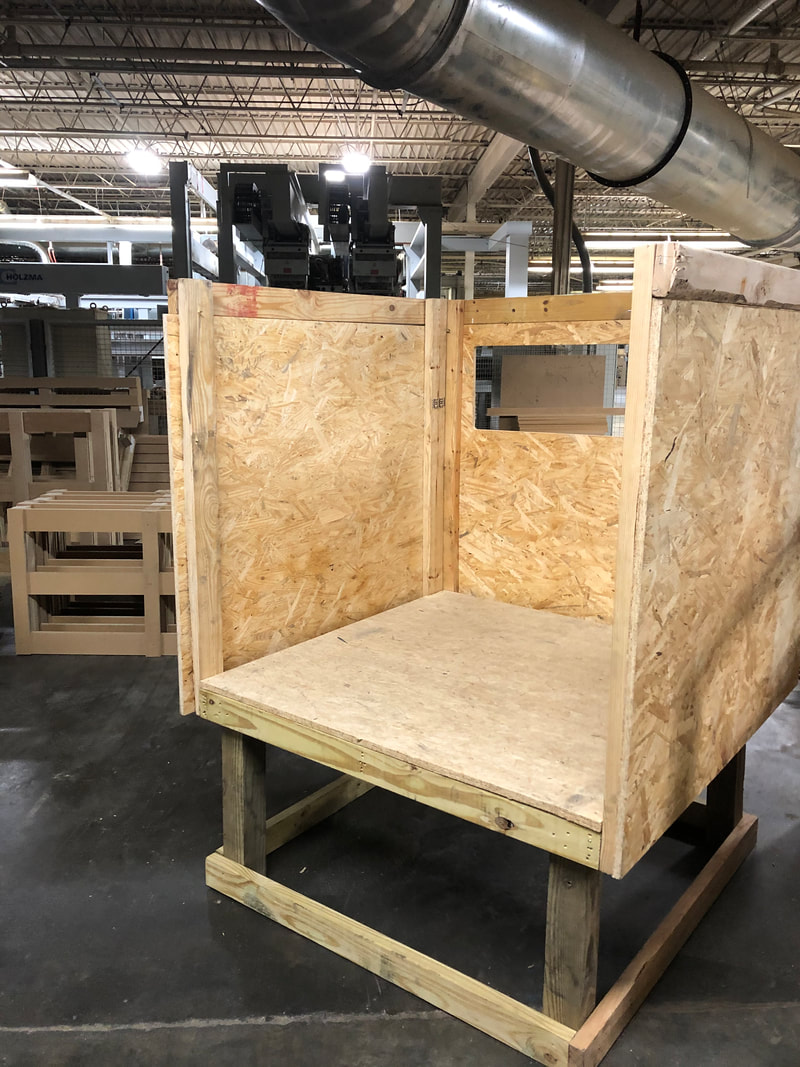 HELPFUL toolsThroughout the project I had access to many tools and resources that definitely helped in the building of the deer blind. These included a large chop saw for cutting 2 by 4’s, a nail gun, and a router for cutting out the walls. The most help of these was probably the router. This allowed me to cut the walls out of one piece of plywood. This made building the walls a much easier task because each wall was one singular piece. The nail gun also helped a lot because of how much quicker it was to attach pieces together. Using screws also would have worked, but using a nail gun was much faster to use. The chop saw was definitely easier than other options like a miter saw, but it wasn’t as much of a difference as the other tools.
1 Comment
Attaching the WallsThis week I finished the exterior of the blind. I attached the walls that I cut last week to the frame of the blind. The process was very easy to do. I used a nail gun to attack the walls to the blind. The nail gun made this process very easy to complete. I had to be very precise when attaching the wall to make sure that everything lined up correctly. Doing this does not affect the overall function of the blind, it just makes it look a little bit nicer. Now that I have attached the walls, the blind is completely finished and ready to hunt in. Unfortunately it is not hunting season, so I will have to wait until next fall to test it for the first time. What I didn't get tooI had originally planned to put a roof on the deer blind. However, I do not have enough time or wood left to put a roof on the blind. This is not a huge deal though because the main reason for a roof is to keep everything inside the blind dry, so the blind itself it will work just fine without the roof. I may add a roof to the blind in the future if I feel that it is needed. Extra elementsEven if I did not have enough time to put a roof on the blind, I still have enough time to add some extra elements to it. On amazon I found a green netting that I could attach to the front of the blind. This would add an extra layer of camouflage to the blind. I also have ordered a lawn chair to place in the blind. I already have several lawn chairs that I could have used, but I thought it would be better to get a new one. I did this because most likely the chair will become very dirty because there is no roof.
Cutting the WallsThis week I got help from my dad. In order to cut the walls of the blind I used a router at where my dad works. There are other ways to cut the walls like using a circular saw, but using a router was definitely the most exact and quick way to do it. I did not know how to use the machine so my dad had to show me how to do most of it. The first thing we did was use a program called CAD that tells the machine what to do. This was a relatively straightforward process. This part I definitely could not have done without the help of my dad because I had never used any program like this before now. After measuring the frame of the blind I learned that each of the walls needs to be 44in by 51in. This is slightly off from what I had intended to do, but it should not matter. I set up the program to cut two 44in by 51in pieces out of the sheets that I had. One of the pieces has a hole in the top of it so that I could shoot out of it. I ran the same program on the two sheets that I had, even though I only needed one piece with a hole in it. This is because it was much easier to create one program than two and it did not matter that much if a second wall had a whole in it. Actually cutting the pieces was incredibly easy. Thanks to the machinery I had access to I was able to completely cut the walls out in 15 minutes. All I had to do was slide the two large pieces of plywood into place and then start the machine. 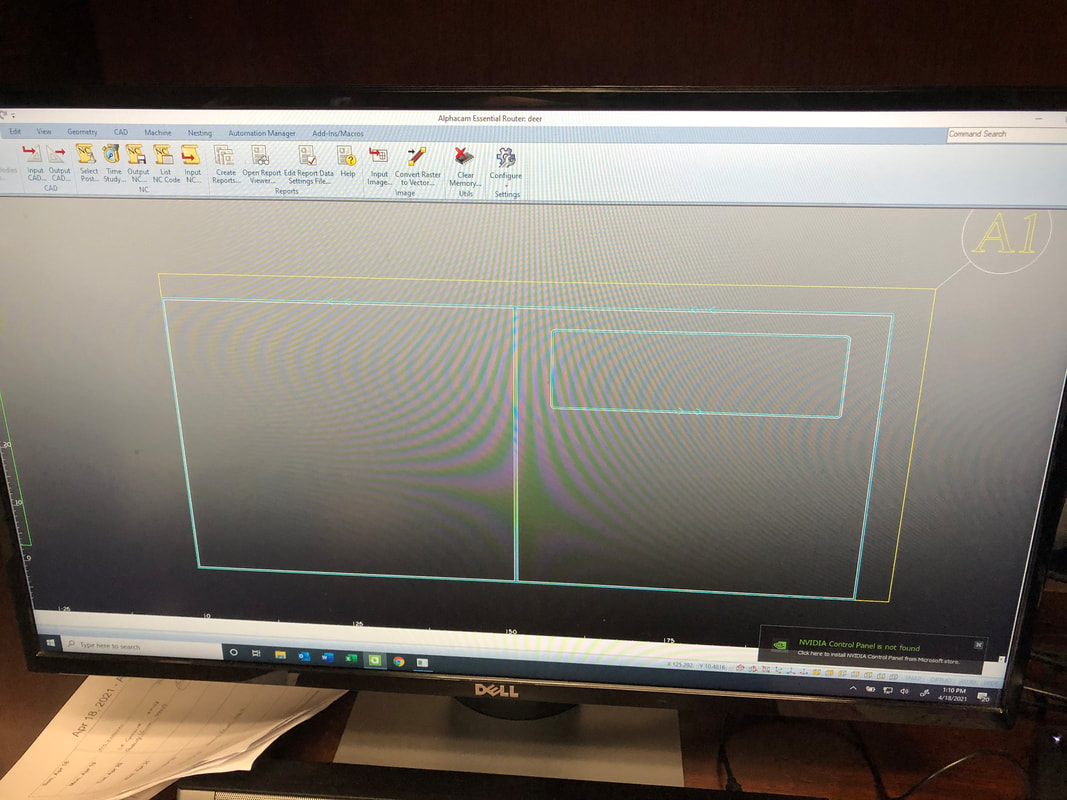 ProblemsThe main challenge I faced this week was that I was in Florida on vacation all week. So I was unable to get out and actually work on the wooden deer blind. This was a problem that I hadn’t considered when I was planning out the project. I didn’t realize that I wouldn’t be able to work on the blind until I was already in Florida, so there was nothing I could do about it. This definitely put me behind in my scheduling. I still need to cut out plywood sheets and attach them to the outside walls of the blind. This will probably be the most time consuming piece of the whole project. I will have to work extra for the remaining weeks in order to catch up. What i did do this weekThe only thing I was able to do this week was research what type of plywood I needed to use for the walls of the blind. I discovered that any pressure treated plywood should work because it would last significantly longer than other types of plywood. I also believe using 3/4 inch thick plywood is the best option. That thickness is definitely on the thicker side for plywood, so it should last longer than any thinner plywood’s. The only downsides the 3/4 inch plywood is that it is heavier and more expensive. I am choosing materials that will last the longest because I do not want to have to deal with maintenance on the blind later and I do not want to worry about it breaking while I’m in it. Next week I plan to purchase plywood and the cut the plywood the correct size for the walls of the blind. Also this week I found a camouflage netting that I would like to put on the outside of the blind. This is a very cheap and is an easy way to improve the final result of the deer blind.
ANOTHER CHANGE in plansI was planning to build the walls of my deer blind out of pallets so that I could keep the cost of the deer blind down. Wood is extremely expensive right now and I have plenty of pallets that were lying around, so this was a great alternative to framing the blind with wood. However, I was able to get enough wood very cheaply, so that I could frame the blind instead. Even though using pallets was a good option, framing is much better. This weekThe first thing I did when framing the blind was build the outside supports. I made the supports of the corners two sides, so that the frame was stronger and was even all the way around. I made the walls 4ft high which should be plenty tall enough to hunt out. This was a relatively easy process to do because the tools I had access to. Next I attached several beams to the tops of the supports to connect them together. At this step I ran into a minor problem. Even with my efforts to make the blind a perfect square, it still was longer on two sides than the other two. The wood that I had available to me was not long enough to finish the final side of the blind. Next week I will have to go to Lowes Hardware to get a board that is long enough to finish that side of the blind. 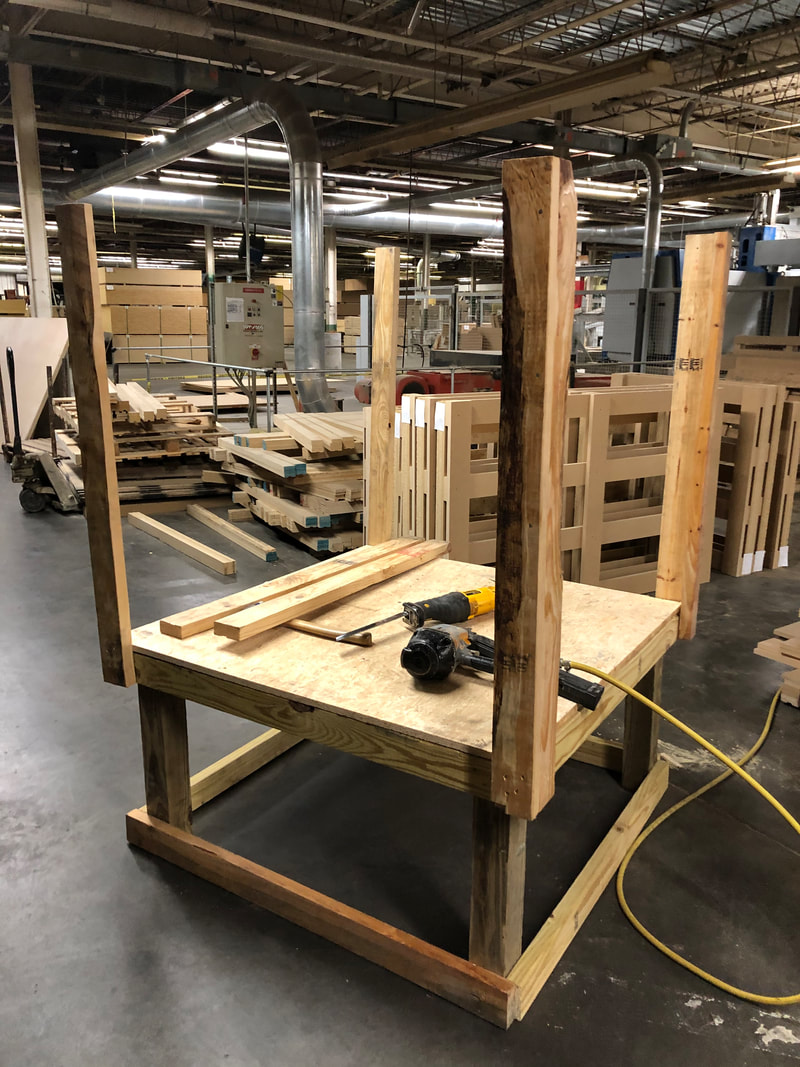 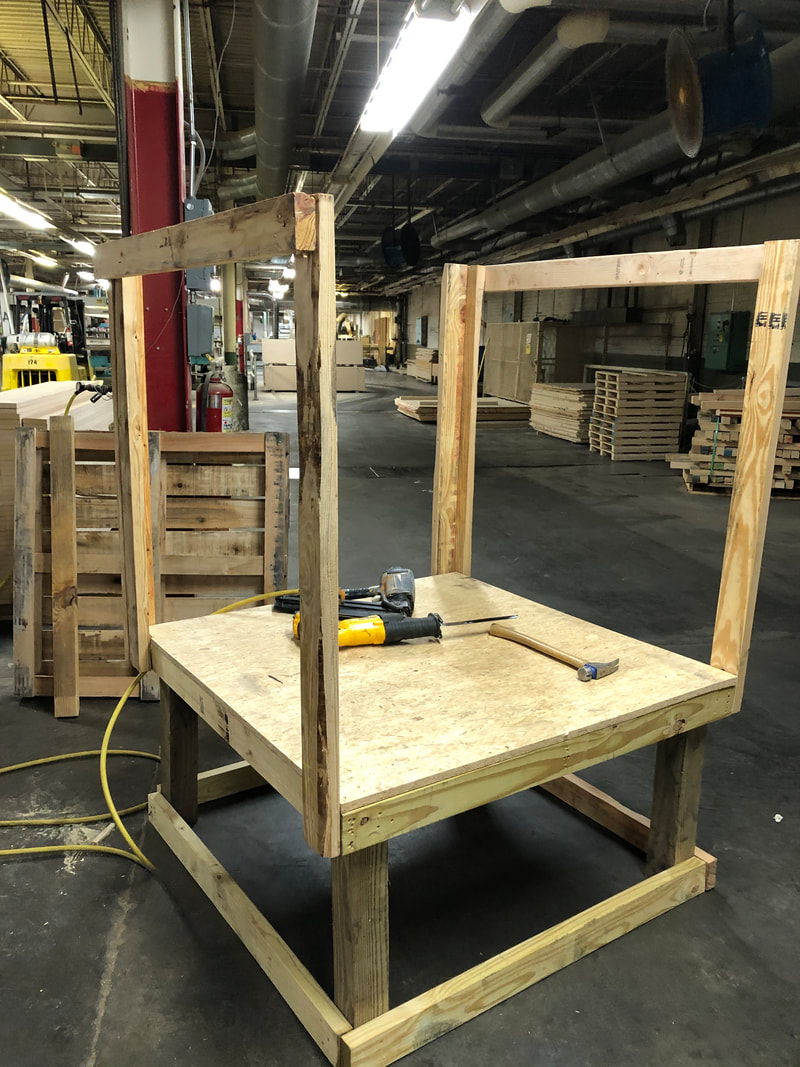 Next week PlansNext week I will be finishing the walls of the blind. To do this I need to cut pieces of plywood to place on the outside of the walls. This week I took the measurements so that I know what size I need to cut the plywood to next week. After that I will have finished the main structure of the deer blind.
Bracing LegsThe first piece of the project that I completed this week was bracing the legs of the frame. This was necessary because it gives the blind extra support. Any extra support is very helpful because I am going to be sitting in the blind, so I would like for it to not collapse or fall down. To do this I attached four 2 by 4’s onto the legs of the blind with a nail gun. This step went on without any challenges at all. 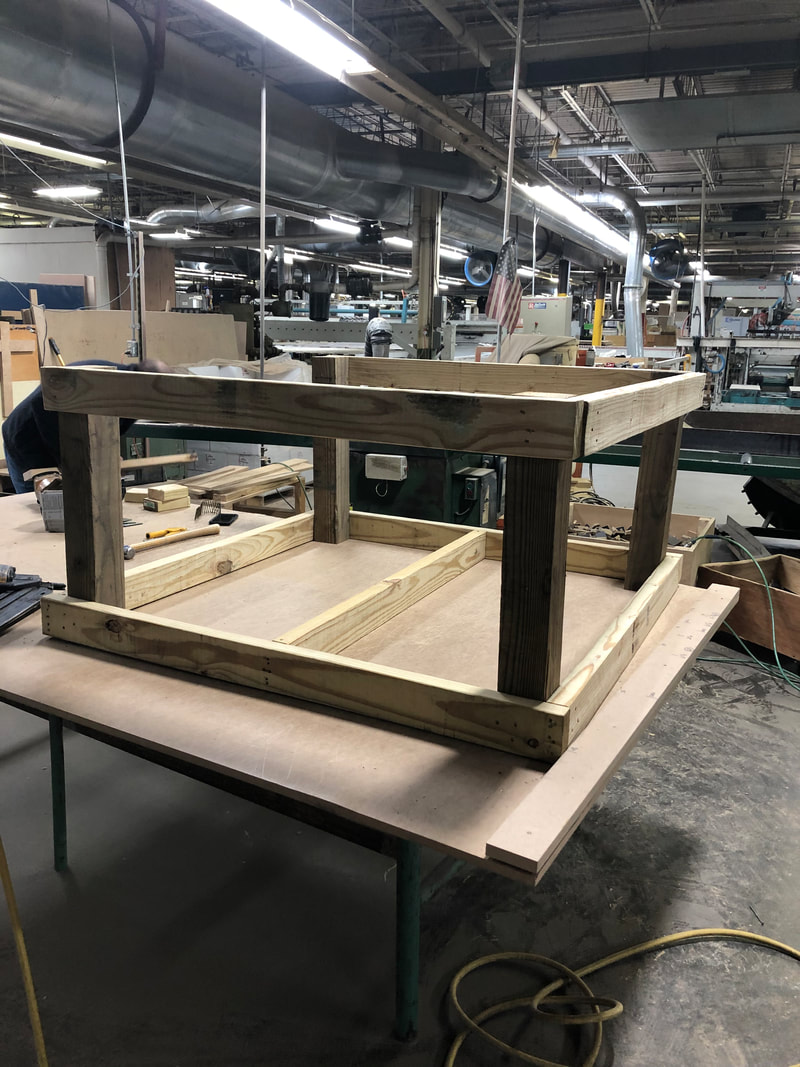 Plywood FloorThe second thing I did this week was cut out a piece of plywood for the floor of the blind. I used 3/4 inch plywood so the floor can be much stronger. The frame of the floor has extra supports so it would probably have been fine to use thinner plywood, but it can not hurt to have more support in the floor. I used a circular saw to cut the plywood to 48ft by 48ft, which is the size of the frame. This was relatively easy to do. The only challenging part was to get the dimensions to be exactly the right size. The next part was to secure the plywood floor to the lower frame. I used a nail gun to secure the plywood floor to the lower frame of the blind. When doing this I made sure to put in way more nails than needed. I did this so that the plywood floor would not move at all and because over time some of the nails may come out of place, so if there are extra nails then the plywood should stay secure for a very long time. The lower piece of the blind is now completely finished. It appears to be very sturdy and strong which is definitely a good thing 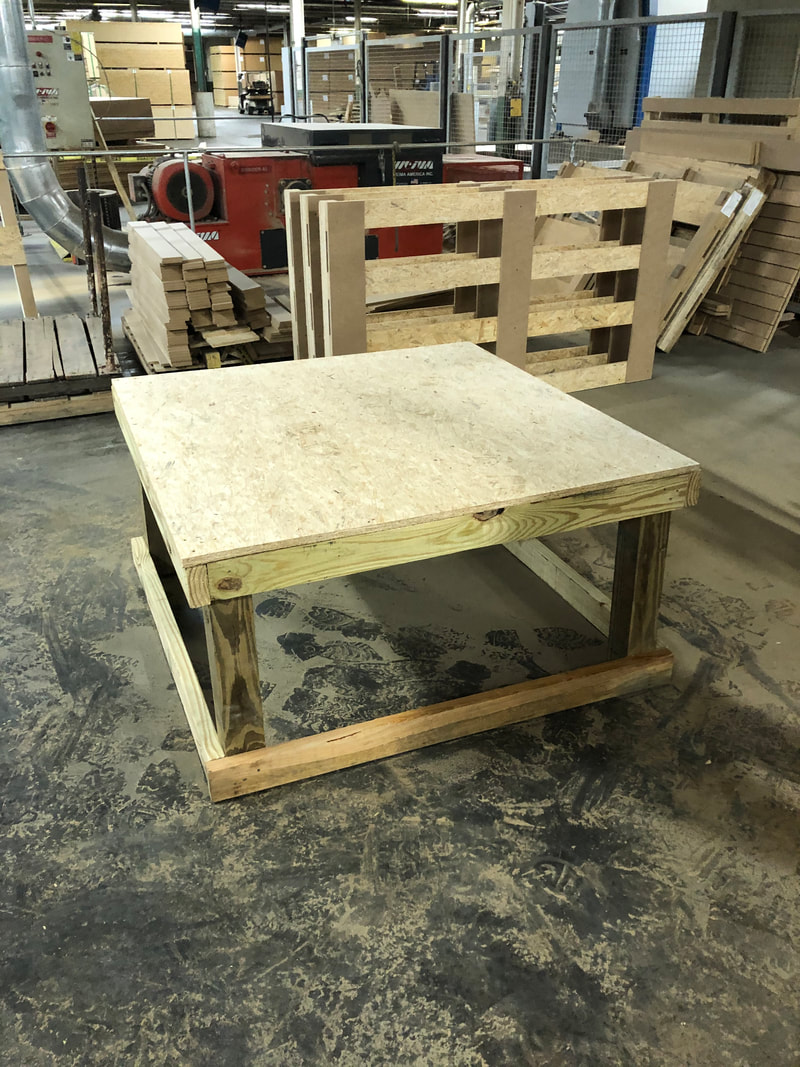 FloorThis week I finally started working on the deer blind. The first step in the process was to build the lower floor of the blind. I am making the floor of the deer blind 4ft by 4ft. This size was chosen because the pallets that I am going to use for the wall are that long and there's no way for me to alter the length of the pallets. For the floor I made a square with one piece of wood in the middle for supports. The building of this piece of the project went relatively smoothly. The only problem I ran into was using too short of nails to secure pieces to each other. This caused the boards to come apart because they were not held together strongly enough. All I needed to do to fix this problem was redo the nails with longer screws. I plan to later put a piece of plywood over the floor so I can stand on it. Unfortunately I did not have the plywood, so I will have to wait until next week to finish the floor of the blind. 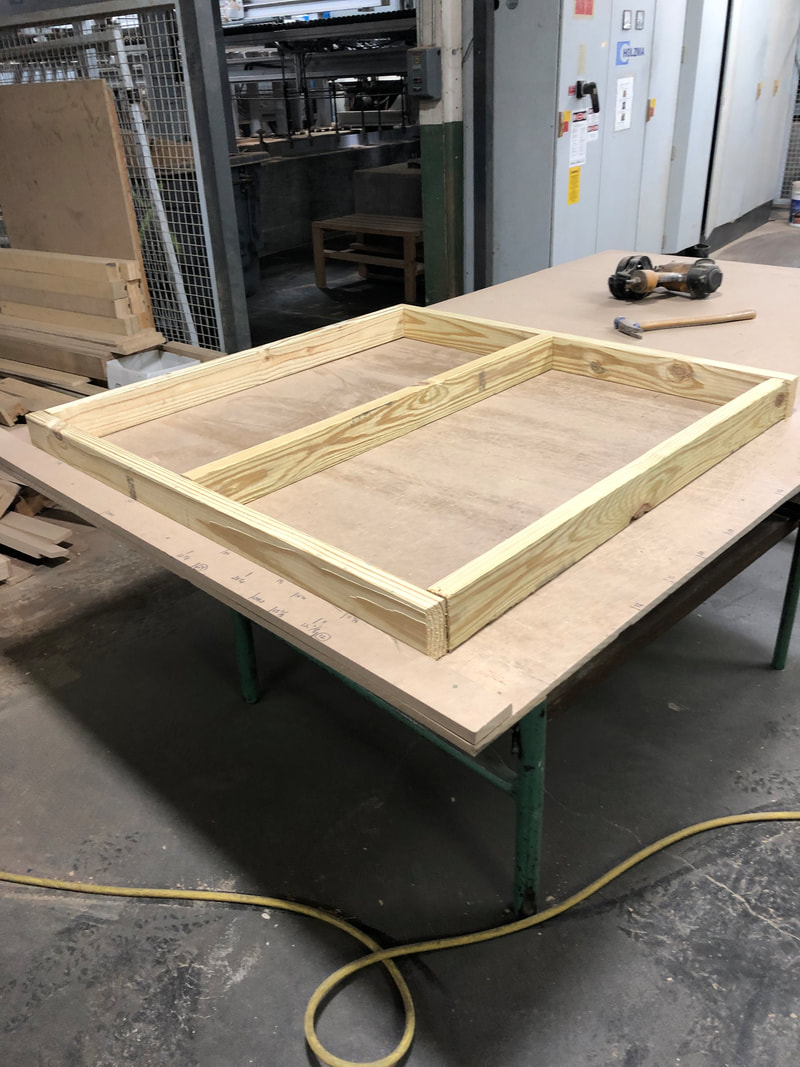 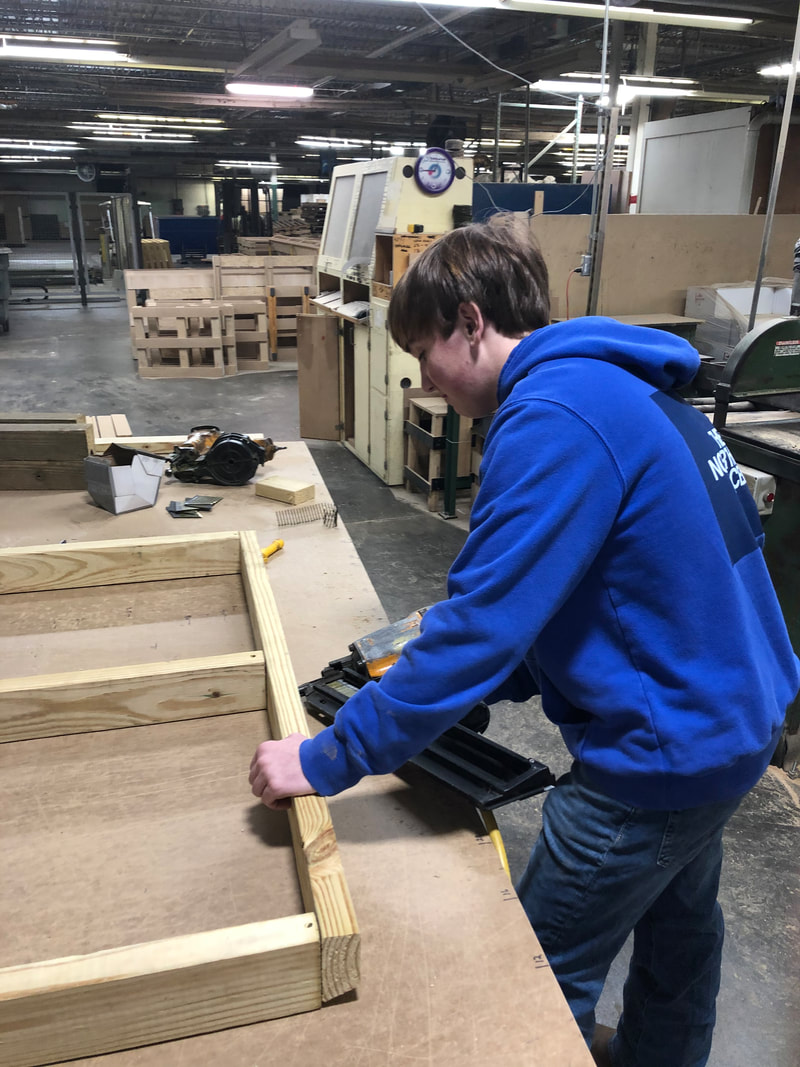 Lower supportsThis week I also completed the lower supports of the blind. The 4 by 4 board that I had purchased earlier for the lower supports was 8ft long. I cut the board into four 2ft long pieces to use to raise the blind of the ground. It is lower than I had originally planned, but with the price of wood being so high right, it is all I really want to pay for now. Attaching the posts to the floor was quite easy to do. 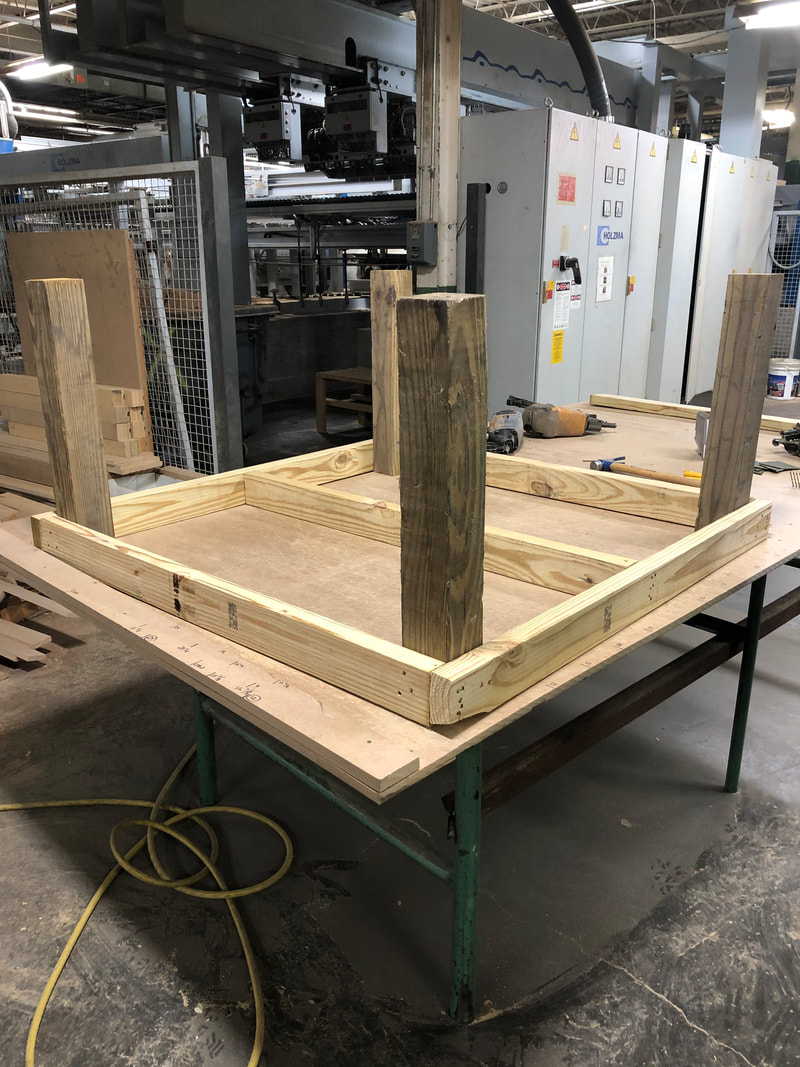 Next weekNext week I plan to brace the lower legs of the blind, cut the plywood for the floor, and install the plywood onto the floor. I do need to purchase the wood to finish that piece next week. However, there should be no problem with completing this piece.
LocationThis week for my Genius Hour project I located and cleared out an area for my deer blind. The location is in a small clearing in a wooded area behind my house. The location being near my house will allow for it to be easily accessible or me to work on. The location is also definitely good enough for me to hunt in. I cleared brush away from the area where I wanted to place the blind. Doing this was not hard, just very time consuming. I also raked back the leaves to get to the dirt. This was very easy to do and took very little time at all. The ground is slightly uneven so I will have to dig into the ground to make sure that the blind can be completely level. This may be challenging to do, but there's no other location that I can place the blind that is better, so I will just have to work around it. Next week I should be ready to start on the construction of the base of the blind. 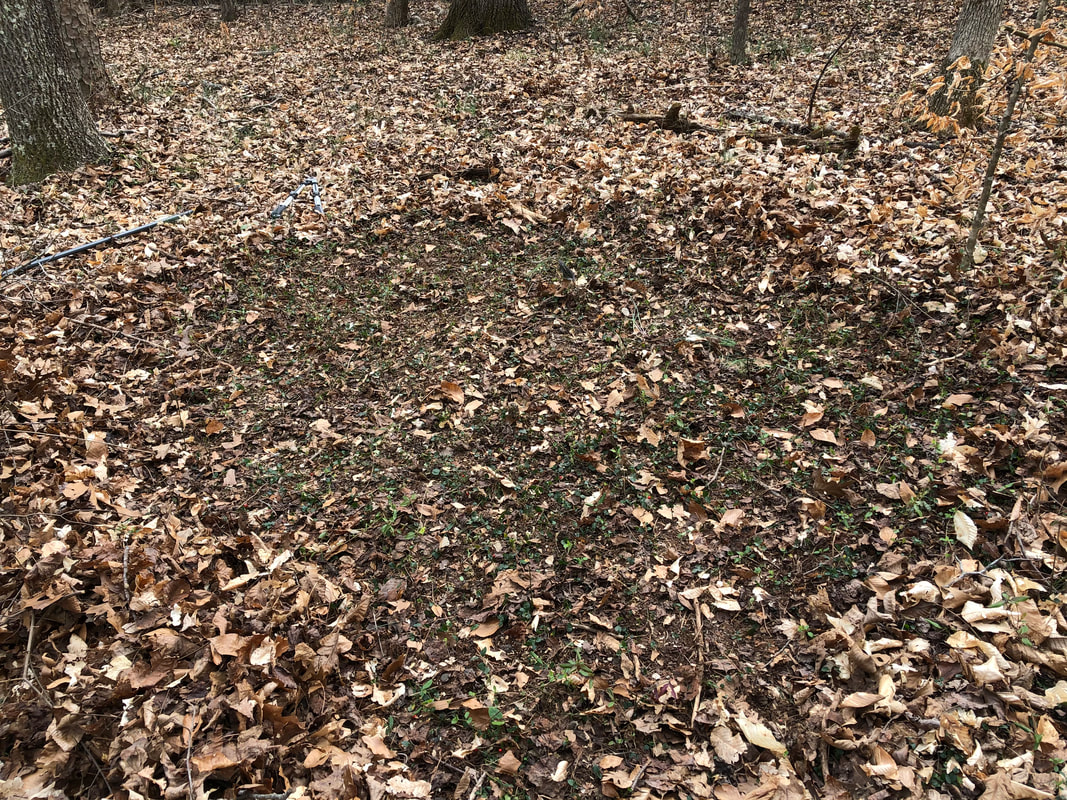 New plansLast week I mentioned that I am probably going to need to change my plans for the blind. I need to do this because the cost of lumber right now would make the blind incredibly expensive. While I was researching for new plans, I found plans that used pallets to build the frame of the blind. This is perfect for me because my dad has hundreds of pallets where he works, so it will be very easy and cheap for me to get the materials for the blind. The frame will still need to be made out of wooden posts, but it will still be very cheap when compared to what the price was originally going to be. The roof can be made mostly out of pallets, but some other pieces will need to be added to keep water out of the blind.
MaterialsI was able to go to Lowe's hardware this week and acquire some of the needed materials. I had planned on using some of my dad's materials, but he did not have anything that I could use. At Lowes I purchased enough to get started with my project, but definitely not enough for the entire project. This is because lumber prices are extremely high right now and I am hoping that if I wait to get the rest of the materials the prices will go down some. The materials I have now will be used to build the base of the deer blind. I purchased 4x4 posts and 2x4 boards to build the base of the deer blind. 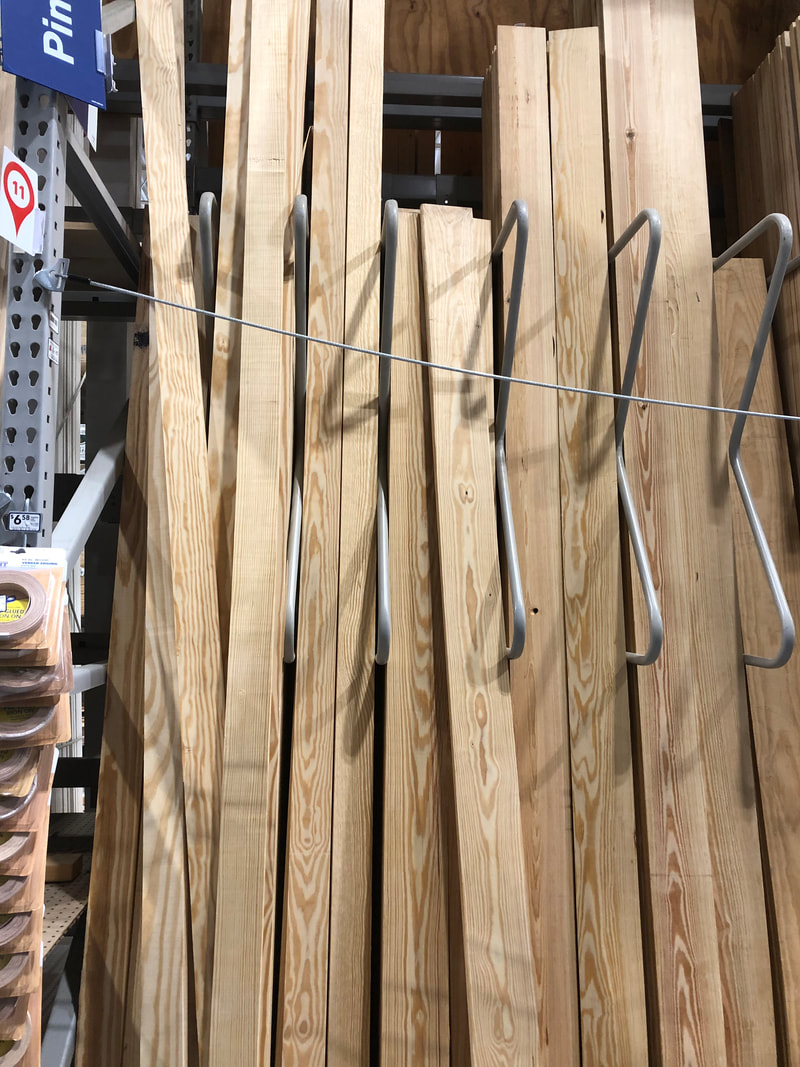 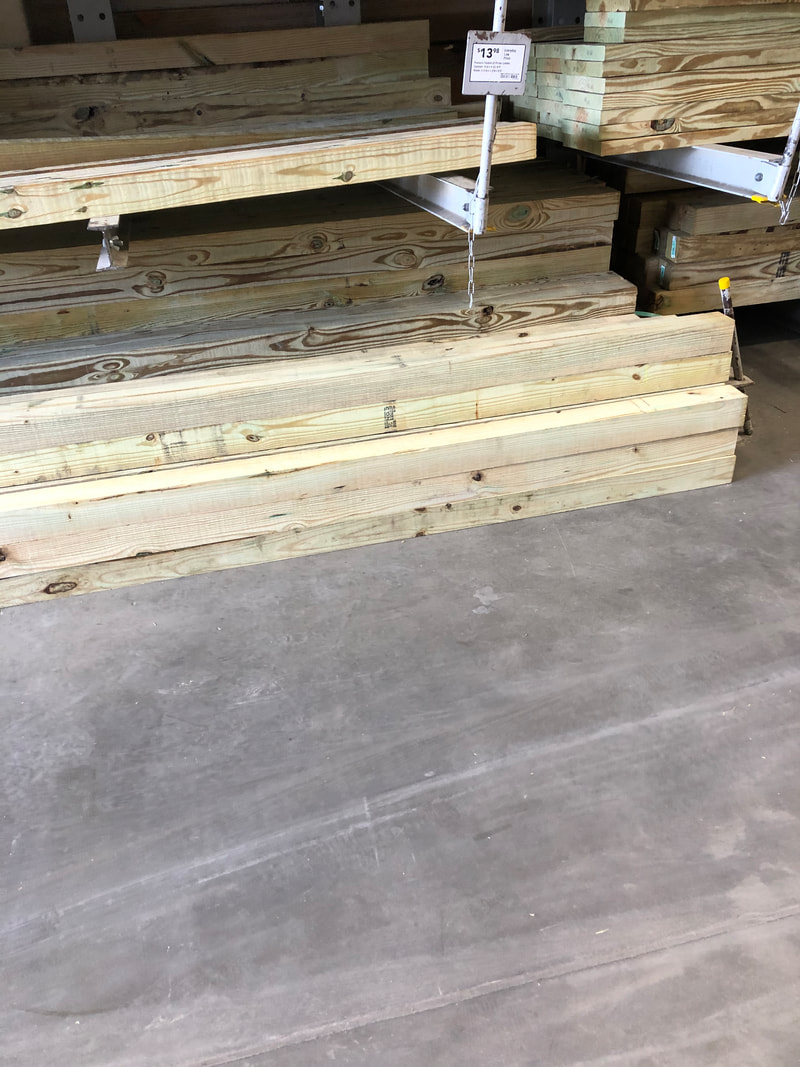 ProblemsThe price of would being so high could lead to a very big problem. I am currently hoping that the prices will go down, but there's really no way to know what is going to happen. Thankfully the prices have been slowly dropping, but they are still very high. If the prices continue to stay as high as they are now, I am going to half to change the plans of the blind to make it smaller. Making the blind smaller will definitely make the overall cost lower, but it will be challenging to change the plans halfway through the project. I was originally planning to build a 4x8 deer blind that was 10ft high. I do not want to change the height of the deer blind because it is much easier to hunt when you are raised up off the ground. However, there is a very good chance that I may need to change the overall size. The size I was planning to do would fit 3 to 4 people. I am thinking that I may need to change the plan so that it fits 2 people instead. It could not go any smaller than a two person stand though.
ProcsessAs I was researching I realized that there are two ways to build a deer blind. The first would be to build the lower supports first and then build the house on right on top of the base. The second way would be to build the frame and house desperately, then lift the house onto the frame. After talking to other people who have built deer blinds previously I have decided that it will be easier to build the two pieces separately and then attach them together later. I will build the frame first and then build the house on the ground. I will then use a skid steer to lift the house onto the frame and attach them. DEsignI have found a design that fits what I need. It is a 4 by 8 blind that appears to be very sturdy and weather resistant. The plan also has the blind being 10 feet in the air which is the perfect height. This is important because I do not want to deal with having to constantly repair it or worry about it collapsing while I am sitting in it. The design also has a slanted roof to drain water. The slanted roof will definitely help the blind last significantly longer and require less repairs. MaterialsChoosing the right material is one of the most important parts about building the deer blind. The wood needs to be very sturdy and pressure treated. Fortunately my dad runs a plant where he cuts wood component parts. So I may be able to get some reclaimed wood to use for the frame from him which will significantly cut down on the price of building the deer blind. I will definitely be able to use some of his extra plywood for the walls of the house. I already have most of the needed tools and machines to cut and build the deer blind.
|
AuthorI'm Ty and these blog posts are to show off my progress for my Genius Hour project. Archives
May 2021
Categories |
 RSS Feed
